A home sleep study is a handy and effective manner to diagnose sleep problems together with obstructive sleep apnea (OSA) without the need for a single day to live at a sleep lab. It allows patients to sleep comfortably in their own homes while a portable device records essential statistics about their breathing styles, oxygen levels, and heart rate. Unlike in-lab polysomnography (PSG) checks, which require multiple sensors and health center visits, a home sleep apnea test (HSAT) is simple to set up and use. However, to ensure accurate results, proper coaching is essential.
Information on how to prepare for a home sleep study is crucial. From keeping off stimulants to ensuring the right setup of the device, each step plays an important role in taking pictures of reliable sleep information. This manual will guide you through all the necessary steps to ensure you get the most out of your home sleep test.
📌 Looking for a dependable home sleep observer? 👉Book your test nowadays.
Understanding the Sleep Study Equipment
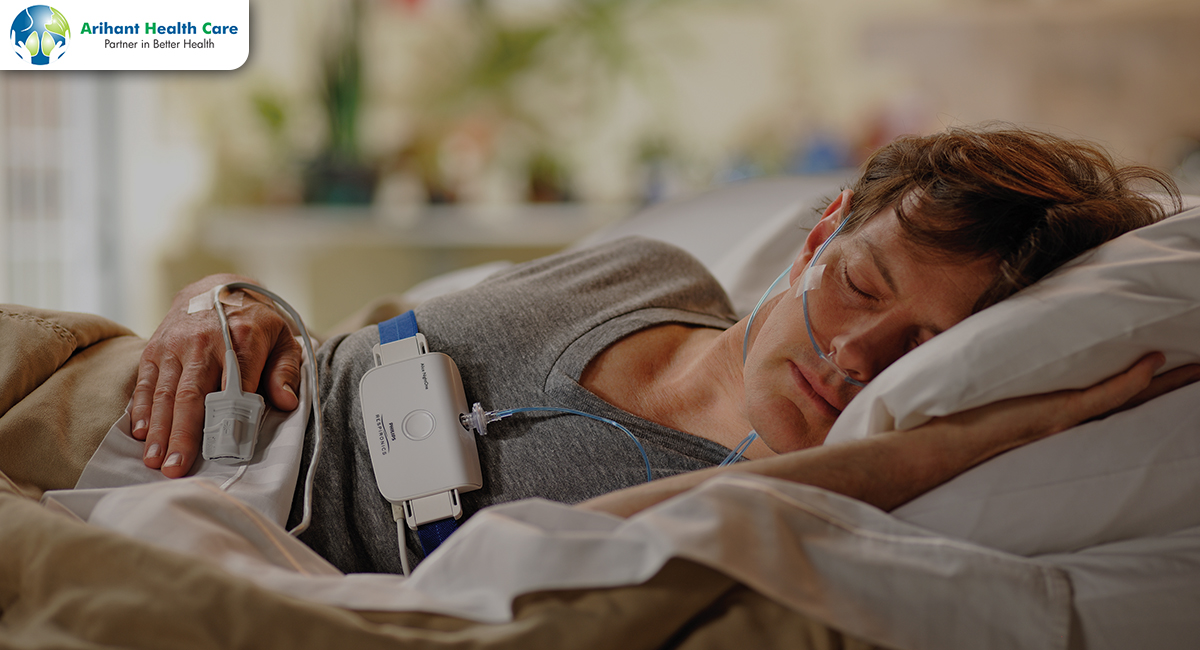
It’s crucial to familiarize yourself with the device before starting your home sleep study. The check package typically includes a nasal cannula, which measures airflow through the nose; a pulse oximeter that tracks blood oxygen degrees and heart rate; and a belt sensor worn around the chest or abdomen to display respiration actions. Some gadgets may additionally encompass a microphone to locate loud night breathing and an accelerometer to track body position modifications throughout sleep.
Each of those additives is vital for detecting sleep disorders, specifically sleep apnea, which causes breathing interruptions all through the night. Familiarizing yourself with the system before bedtime will ensure a smooth setup process. If you’ve got any doubts, your healthcare issuer will offer commands on how to connect and use each thing properly.
Following Your Regular Sleep Routine
Maintaining your ordinary sleep routine on the night of the test is essential for acquiring accurate results. Your body needs to be in its herbal rhythm to reflect genuine sleep patterns, so attempt to go to bed at your traditional time. Avoid daytime naps, which will make it harder to sleep. Keeping your bedroom environment as snug and quiet as viable will help you loosen up and get a restful night’s sleep.
If you usually interact with a pre-sleep routine, including studying an e-book or paying attention to gentle songs, you could continue to do that. However, avoid screen time at least an hour before bed, as the blue light emitted by using digital devices can intervene with melatonin production and have an effect on sleep quality.
Avoiding Caffeine, Alcohol, and Sedatives
Certain substances can disrupt your sleep cycle and impact the accuracy of the check. It is beneficial to keep away from caffeine in any shape, including coffee, tea, soda, and energy drinks, for at least six hours earlier than bedtime. Caffeine acts as a stimulant, making it more difficult to nod off and reducing the depth of your sleep stages.
You should also avoid alcohol on the day of the check. While it can make you feel drowsy initially, it is able to interfere with sleep architecture, leading to fragmented sleep and unusual respiratory styles. Similarly, do not take sleep medicines or sedatives unless explicitly prescribed by your doctor, as they can regulate your ordinary respiratory function and skew the test outcomes.
Preparing Your Skin and Body for Sensor Placement
Ensuring that the sensors continue to be securely in place throughout the night is a vital part of the check. Before attaching the sensors, clean your face and chest with soap and water to remove any oil, lotion, or makeup, as these materials can cause sensors to slide or lose touch with the pores and skin. If vital, men may additionally want to shave regions where the sensors could be placed to improve adhesion.
We recommend wearing loose, comfortable clothing, such as a T-shirt and shorts. It will be easier to attach the device and prevent pain, which could disrupt your sleep.
Setting up the home sleep study equipment
After preparing for the mattress, sit in a well-lit area and carefully follow the instructions included with your home sleep test kit. Secure the chest belt snugly around your upper body to reveal respiratory actions. Place the nasal cannula into your nostrils and gently roll it to measure the degree of airflow. Clip the pulse oximeter onto your finger to show oxygen saturation ranges and coronary heart charge.
After attaching all of the components, switch on the tool and make certain that it is recording well. Some sleep video display units have indicator lights or show monitors that confirm whether the sensors are functioning correctly. If something seems off, reattach the sensors and confirm that they are in the perfect position before getting into bed.
Sleeping Naturally and Avoiding Excessive Movement
Keep a watch on it during your sleep, strive to maintain a natural sleeping position, and avoid unnecessary movements that could cause the sensors to shift. While occasional transferring is regular, excessive movement may also motivate the tool to lose connection, leading to incomplete or faulty information.
Check that all sensors remain securely connected if you wake up in the middle of the night before returning to sleep. If any components have come unfastened, reattach them carefully without stressing your relaxation an excessive amount. The goal is to document a complete night’s sleep with minimal disruptions.
Complete the study and return the equipment.
When you wake up, the first step is to turn off the device and put off all sensors cautiously. Place them back in their precise storage bag to prevent harm. If your healthcare provider has told you to complete a sleep log or questionnaire, achieve this earlier than returning the device.
Once the device is returned, the recorded records can be analyzed with the aid of a sleep expert, who will determine your breathing styles, oxygen ranges, and sleep needs. Based on the outcomes, your doctor will determine whether you have sleep apnea or some other sleep problem and propose remedy options if essential.
Common Mistakes to Avoid During a Home Sleep Study
Many humans make mistakes that can compromise the accuracy of their sleep check consequences. One of the most commonplace mistakes is forgetting to turn at the tool before drowsing. Always double-check that the device is powered on and functioning effectively.
Incorrect sensor placement also can lead to misguided readings. Make sure that the chest belt is properly secured, the nasal cannula is in the right position, and the pulse oximeter is firmly attached. Avoid using lotions or oils, which could cause sensors to slip off for the duration of the night.
Sleeping in an uncommon function simply due to the tool can also affect effects. Try to sleep as naturally as viable, even supposing it approaches repositioning the sensors slightly. Lastly, do not now do away with the sensors too early—a complete night’s statistics collection is vital for a complete evaluation.
How Home Sleep Studies Help Diagnose Sleep Disorders
A home sleep test is an effective diagnostic device for obstructive sleep apnea (OSA) and different sleep-related respiratory problems. It affords precious insights into how your frame features all through sleep, including respiration styles, oxygen stages, and heart charge variability. Identifying and treating sleep apnea is critical because untreated sleep disorders can cause serious fitness dangers, which include high blood pressure, heart disease, stroke, and sunlight hours fatigue.
If you suspect you have sleep apnea or experience frequent loud night breathing, breathing pauses, or excessive daytime sleepiness, consider scheduling a home sleep study as soon as possible.
Conclusion
Preparing for a domestic sleep study involves a few simple but crucial steps, from information about the system to following the right pre-test routine. Avoiding caffeine, alcohol, and displaying screen time earlier than bedtime, putting in place the tool correctly, and dozing clearly can make a sizable difference in check accuracy.
A domestic sleep look is a convenient and price-powerful manner to diagnose sleep issues and take step one in the direction of higher sleep health. If you or a loved one is experiencing sleep issues, schedule a check-up today and experience the relaxation you deserve.
Get started on your sleep health journey these days! 👉 Book Your Home Sleep Test